0029: Menus IV - The RadioMenuItem
Today we start on RadioMenuItems with a simple example. Next time, we’ll carry on with a second example, but with a more practical bent.
I said in an earlier post that RadioButtons are more complex than other GTK widgets. Well, RadioMeniItems are too, but in different ways. Those differences start with inheritance.
Whereas the RadioButton inheritance chain looks like this:
Button(great-grandparent),ToggleButton(grandparent), andCheckButton(parent),
the RadioMenuItem inheritance chain is shorter:
MenuItem(grandparent), andCheckMenuItem(parent).
But this simply means that, like with RadioButtons, we have to manage mutual exclusion or we could end up with the whole set of radio items turned on (or off) at the same time. If that’s the functionality we need, we’d be better off with CheckMenuItems. If you follow the methods laid out in the examples we look at this time and next, that won’t be a problem.
One to the first example…
A Simple RadioMenuItem
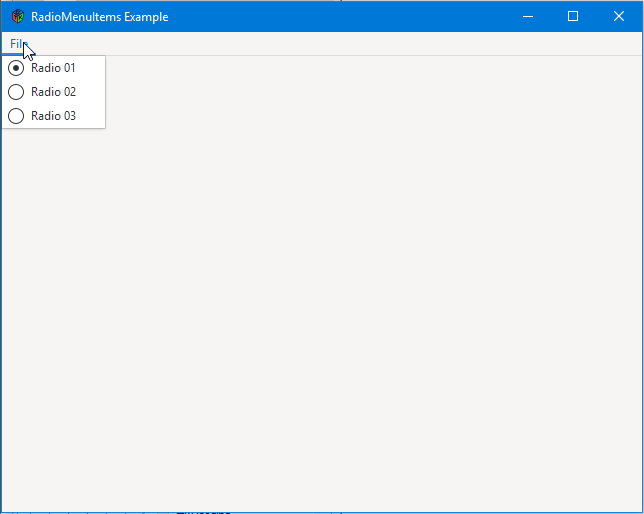
If we look at the MyRadioMenuItem class, right off the bat we can see some differences in how the constructors are set up compared to the CheckMenuItem:
class MyRadioMenuItem : RadioMenuItem
{
string message = "The setting state is: ";
this(ListSG group, string radioLabel)
{
super(group, radioLabel);
addOnActivate(&choose);
} // this()
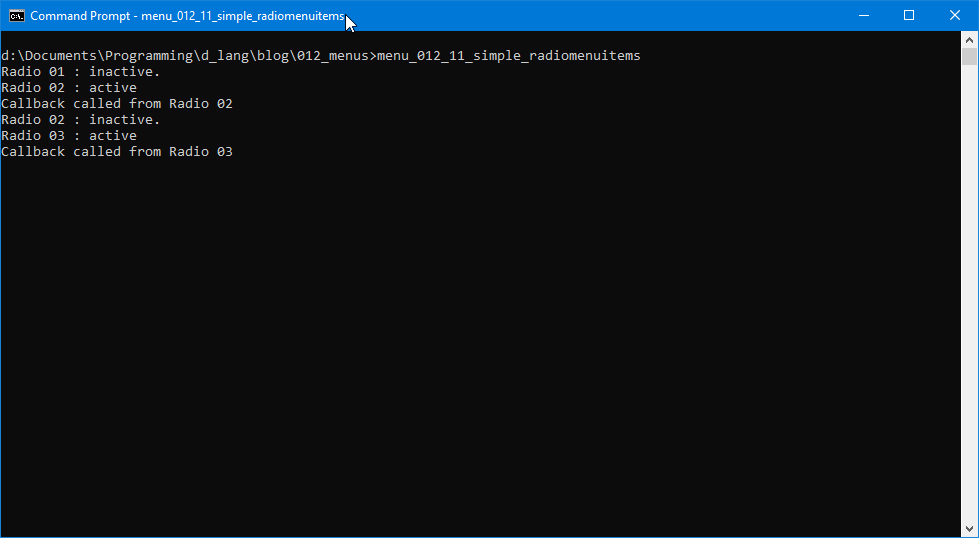
void choose(MenuItem mi)
{
bool radioMenuItemState;
radioMenuItemState = getActive();
if(radioMenuItemState == true)
{
writeln(getLabel(), " : active");
workingCallback();
}
else
{
writeln(getLabel(), " : inactive. ");
}
}
void workingCallback()
{
writeln("Callback called from ", getLabel());
} // workingCallback()
} // class MyRadioMenuItem
Firstly, this constructor is designed to build a generic RadioMenuItem (as opposed to one with a function different from others in the same set) and to that end, it takes two arguments:
- a
ListSG group, and - a string of label text.
We’ll talk more about the group argument when we get to the FileMenu class.
And as for the callback, we’re looking at a different approach to signal handling. In the RadioButton example, all we had to do was react to the signal and our work was done. But with RadioMenuItem, we have to:
- react to the signal,
- go find the state of the
RadioMenuItem, and finally - take action (or not) based on that state.
RadioMenuItem with a Different Signal

Note: The onToggle signal also works as can be seen in this bonus example which differs only in which signal is used.
Now let’s look at the FileMenu class…
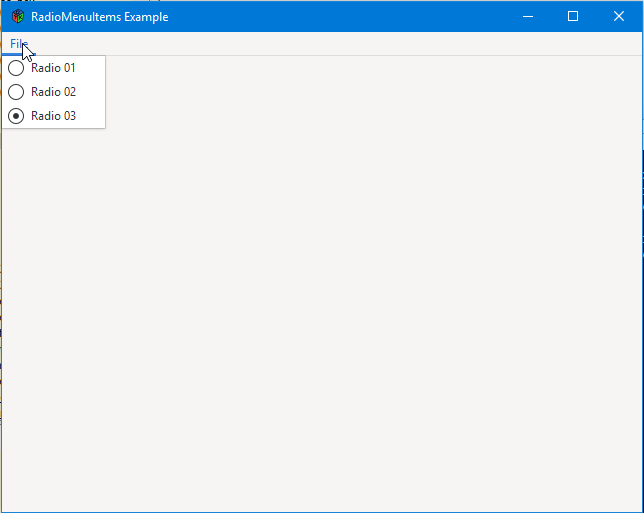
FileMenu Class
Here’s what it looks like:
class FileMenu : Menu
{
	MyRadioMenuItem radioItem01, radioItem02, radioItem03;
	ListSG group;

	this()
	{
		super();

		radioItem01 = new MyRadioMenuItem(group, "Radio 01");

		radioItem02 = new MyRadioMenuItem(radioItem01.getGroup(), "Radio 02");
		radioItem03 = new MyRadioMenuItem(radioItem01.getGroup(), "Radio 03");

		append(radioItem01);
		append(radioItem02);
		append(radioItem03);

	} // this()

} // class FileMenu
We’ve worked with the ListSG group before, but perhaps without realizing it. If you look back at the example code for a RadioButton, you’ll see that the group is not named up front like it is here. Instead, it’s declared and defined somewhere in the inner workings of the first RadioButton’s constructor and we only see it as a member of the radioItem01 object.
But, in the current case, a non-instantiated ListSG group is declared in the FileMenu object (which is coming up next in this discussion) and passed along to the super-class’s constructor. Internally, as far as the super-class is concerned, nothing’s all that different. It still does the heavy lifting and it still stores group as a member variable in radioItem01. The only thing that changed was how the group variable started out. In the earlier example, it was created by the super-class. This time, it starts as a local variable here in the FileMenu object.
And is there a difference? Not really. It’s just another option. In fact, you may think you can pass group as an argument to radioItem02 and radioItem03, but if you do, their constructors assume it’s undefined and overwrite it. The result is that you end up with each RadioMenuItem in its own private group instead of being part of a set.
Aside: This process of passing an undefined group to the first RadioMenuItem also works with RadioButton as can be seen in this bonus code example. Look in these areas to see the changes:
- the import statements for
import glib.ListSG, - the
RadioBoxclass, and - the
MyRadioButtonclass.
And that’s it for this time, but we’ll be back with the practical example on Tuesday. See you then.

Comments? Questions? Observations?
Did we miss a tidbit of information that would make this post even more informative? Let's talk about it in the comments.
- come on over to the D Language Forum and look for one of the gtkDcoding announcement posts,
- drop by the GtkD Forum,
- follow the link below to email me, or
- go to the gtkDcoding Facebook page.
You can also subscribe via RSS so you won't miss anything. Thank you very much for dropping by.
© Copyright 2024 Ron Tarrant