0102: Grid Column & Row Spacing
Last time, we embarked on another CSS adventure and this post is somewhat related. We’ve got another Grid, but last time we used setSizeRequest() to give each Grid square some territory of its own so they wouldn’t looked all shoved together.
But this time, we’re going to do things a little differently. We’ll space them out using two Grid functions we didn’t get around to talking about last year:
setRowSpacing(), andsetColumnSpacing().
Two other Widgets share these functions:
IconView, andFlowBox.
But the Grid, IconView, and FlowBox don’t seem to inherit the spacing functionality from any common ancestor, so we may have to dig into those other Widgets (eventually) to see if there’s a difference in how they’re handled. Be that as it may…
Different Spacing Mechanism, Different Visual Result
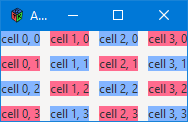
The first time we did this, the red and blue background colours filled the cells, but this time, they won’t. Here’s the difference, visually:
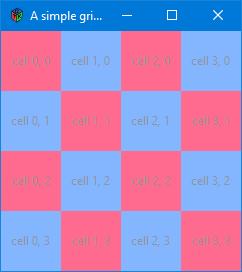
The differences, code-wise, are worth noting. In the earlier version (on the left, above) we used setSizeRequest() to size the cells… well, we actually sized the EventBoxes which in turn forced the cells to an appropriate size.
In the second version (on the right, above) we move the functionality up a level to the Grid, starting with this in the preamble:
int rowSpacing = 10, columnSpacing = 10;
And then we put these values to use in the constructor like this:
setRowSpacing(rowSpacing);
setColumnSpacing(columnSpacing);
But the separation we now have between the cells isn’t all that aesthetically pleasing, so let’s bring back the cell sizing by moving that task down a level to RedLabel and BlueLabel…
Grid Cell Labels Sized and Spaced
Here’s what it looks like:
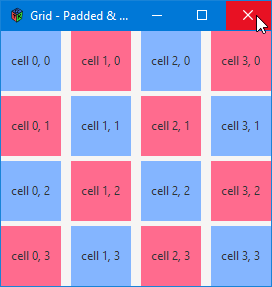
All we’re doing is bringing back this statement in both classes derived from the Label:
setSizeRequest(60, 60);
You could make the argument that adding this statement to both classes is redundant, and yes, you’d be right. And we could, instead, derive a SizedLabel class from Label, then have both RedLabel and BlueLabel inherit from it. Neither way is all that elegant. However, there are two reasons why we may want to stick the SizedLabel class in the middle of things:
- if we needed the cell size to be flexible for some reason, or
- we couldn’t make up our minds as to what size is right and didn’t want to keep changing the size in two places as we experimented.
In the end, it’s up to you to decide which way works best for you.
One other thing I’d like to mention before we move on is that this demo isn’t aesthetically pleasing (you noticed, right?) because the spacing of the rows is different from the spacing of the columns. I did this on purpose to show that they can be different. That’s my story and I’m sticking to it.
Once More, with Buttons
This won’t seem like a big leap right now, but it’s the next step in a progression that will lead us to our a demo in the next post that is a bit of a leap:
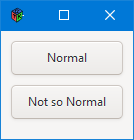

We do pretty much the same thing here as we did last time:
setRowSpacing(rowSpacing);
setColumnSpacing(columnSpacing);
And with these variables both having a value of 10, we almost get a reasonable result. But, we still need the bottom margin set to get that extra bit of space for balance. And to get there, we fall back on this function:
setMarginBottom(marginBottom);
That gives us the end result seen in the screen-shot above. And it doesn’t matter if we set the bottom margin in the Grid or the AppBox. The result will be the same.
Conclusion
Next time, we’ll look at our Button example again, but with a different purpose in mind. We’re going to play around with Widget opacity and ghosting.
Don’t miss it. See you then.

Comments? Questions? Observations?
Did we miss a tidbit of information that would make this post even more informative? Let's talk about it in the comments.
- come on over to the D Language Forum and look for one of the gtkDcoding announcement posts,
- drop by the GtkD Forum,
- follow the link below to email me, or
- go to the gtkDcoding Facebook page.
You can also subscribe via RSS so you won't miss anything. Thank you very much for dropping by.
© Copyright 2024 Ron Tarrant