0089: Nodes-n-noodles VIII – Yes, It’s Alive! (2)
Last time, we looked at the NodeLayout, the surface we’ll be moving the nodes around on and also got started with the MoveableNode by looking at its preamble. This time, we’ll dig into the functions that make moving possible.
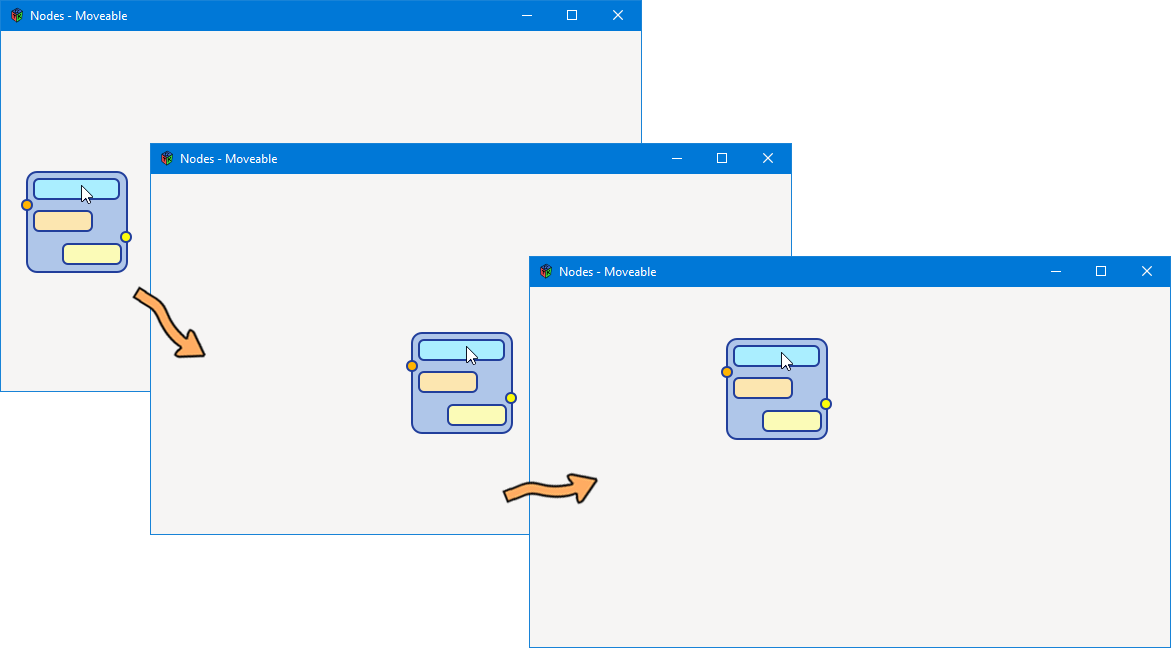
Here’s another look at where we’re headed…
The Moveable Node
The New Functions
The process of moving a MoveableNode breaks down into three stages. We need to separate the actions carried out by our code into what’s happening:
- before the move,
- during the move, and
- after the move.
And in GTK, that’s a simple matter of hooking up three callback functions:
onButtonPress,onMotionNotify, andonButtonRelease.
But before we look at those, let’s take a quick peek at the getters and setters…
The getPosition() and setPosition() Functions
	void setPosition(double x, double y)
	{
		_nodePosition = [x, y];

	} // setPosition()


	double[] getPosition()
	{
		return(_nodePosition);

	} // getPosition()
These each do one simple job. One takes x and y coordinates for the current position of the node and stores them. The other retrieves them. These coordinates are stored and retrieved like this so that as the MoveableNode moves, the new current position can be measured in relation to the old current position. These functions are called over and over as the node moves, about 60 times per second, so the changes in position being measured are from one frame refresh to the next.
The setOffset() Function
	void setOffset(double xOffset, double yOffset)
	{
		_xOffset = xOffset;
		_yOffset = yOffset;

	} // getOffset()
origin to the mouse pointer at the time it was clicked
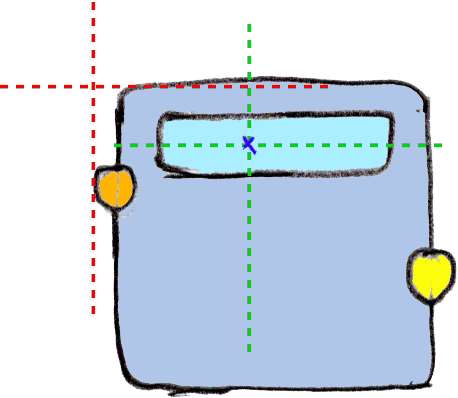
This function measures the offset from the upper-left corner of the node to the spot where the mouse pointer was when it was clicked.
In the illustration to the left, the red dotted lines show the node origin and the green lines represent where the mouse pointer was when the user clicked the mouse button.
Keep in mind, too, that the node’s origin is in a different space than the pointer position. What do I mean by that?
The MoveableNode lives on the NodeLayout and so its origin will be in NodeLayout coordinates. The mouse pointer, when it’s clicked on the node, will be in MoveableNode coordinates. To keep these straight, I think of NodeLayout coordinates as the global space and coordinates within the MoveableNode as local space. And we have to translate between these two spaces to make this all work.
Now, let’s have a look at what needs to happen at each of the three stages mentioned earlier by checking out the callback functions. However, since we’ve covered most of this material before, we’ll just look at the changes…
Changes to onButtonPress()
The changes start in the outer if/else() construct where we check for which hot spot we’re in. Abbreviated, this construct looks like this:
if(xMouse > dragArea["left"] && xMouse < dragArea["right"] && yMouse > dragArea["top"] && yMouse < dragArea["bottom"])
{
}
else if(xMouse > inHotspot["left"] && xMouse < inHotspot["right"] && yMouse > inHotspot["top"] && yMouse < inHotspot["bottom"])
{
}
else if(xMouse > outHotspot["left"] && xMouse < outHotspot["right"] && yMouse > outHotspot["top"] && yMouse < outHotspot["bottom"])
{
}
And this illustrates why we’re using key/value pairs in the hot spot arrays. At a glance, the purpose of "left" and "right" are easier to see than 0 and 1.
So, when we find the right hot spot, one of these three flags is set to true:
_dragOn,_connectToIn, or_connectToOut.
As mentioned before, we aren’t yet using the _connectToXX flags, but they’re there as placeholders. Each of these flags sets things up for our next test. In the case where the drag handle was clicked, once the _dragOn flag is set, we see this:
if(buttonEvent.button is button1) // ModifierType.BUTTON1_MASK
{
	// dragArea
	setOffset(cast(int)event.button.x, cast(int)event.button.y);
	GdkEventButton* mouseEvent = event.button;
	dragAreaActive(event.button.x, event.button.y);
}
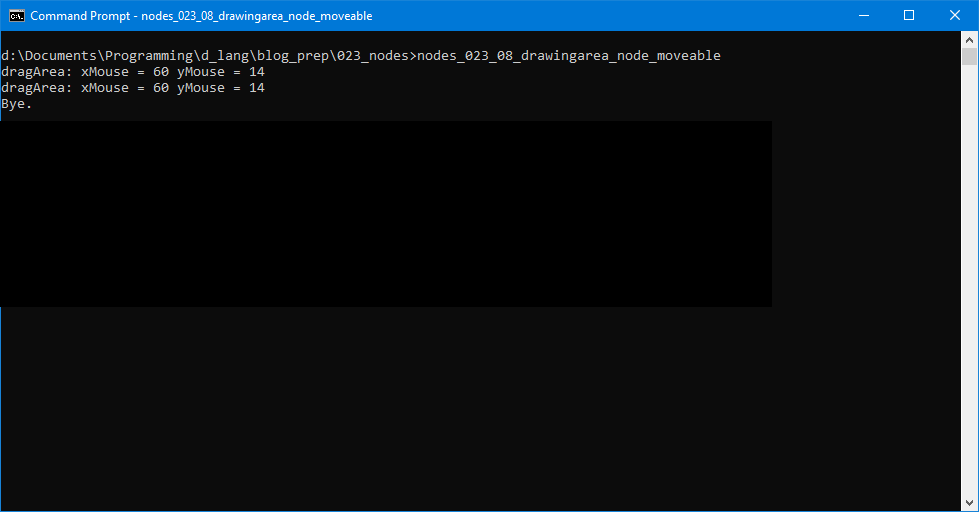
With the condition met (the LMB was clicked), we record the position of the mouse pointer in relation to the upper-left corner of the node, then call dragAreaActive() which, for now, simply reports the offset coordinates. The same, more or less, happens with either of the connection hotspots.
You might think more would happen here, like… well, actually moving the node, but keep in mind that this is only stage one of the process. Now, let’s look at stage two…
Another New Function: onMotionNotify()
If you recall the three stages, this is stage two, the stage where the mouse button is being held down and the mouse pointer is moving:
bool onMotionNotify(Event event, Widget widget)
{
	double newX, newY, pointerX, pointerY;
	GdkEventMotion* motionEvent = event.motion();

	if((motionEvent.state == ModifierType.BUTTON1_MASK) && _dragOn == true) // ModifierType.BUTTON1_MASK
	{
		pointerX = event.button.x;
		pointerY = event.button.y;

		if(pointerX > _xOffset)
		{
			newX = _nodePosition[_xIndex] + (pointerX - _xOffset);
		}
		else
		{
			newX = _nodePosition[_xIndex] - (_xOffset - pointerX);
		}

		if(event.button.y > _yOffset)
		{
			newY = _nodePosition[_yIndex] + (pointerY - _yOffset);
		}
		else
		{
			newY = _nodePosition[_yIndex] - (_yOffset - pointerY);
		}

		_nodeLayout.moveNodeTo(this, newX, newY);
	}

	return(true);

} // onMotionNotify()
The first two variables record where the mouse pointer was when the mouse button was clicked (pointerX and pointerY).
Then we use an if() statement to make sure our motion event is taking place while the mouse button is held down. This is crucial to distinguishing between movement with and without the mouse button qualifier and it’s why we masked in those extra signals back in the constructor.
From there, depending on which way the mouse pointer is moving in relation to where it was to start with, we do a different calculation to find the new node position on the Layout (newX and newY), factoring in the offset mentioned above. The first if/else calculates the x direction, the second works out the y direction.
Read carefully through the calculations for newX and newY. Note that if either x or y is increasing (in other words, the pointer position is less than the offset) the last part of the calculation subtracts the offset from the current pointer position. But if x or y is decreasing (because the mouse pointer is moving left or up, respectively), we turn the calculation around. The offset is subtracted from the pointer position.
And finally, right at the bottom, the line:
_nodeLayout.moveNodeTo(this, newX, newY);
does the actual move.
And because of the nature of this type of operation, onMotionNotify() is called over and over while the mouse pointer is moving and the button is held down.
So, how do we know when to stop? That’s where the next callback comes in…
The onButtonRelease() Function
bool onButtonRelease(Event e, Widget w)
{
	_dragOn = false;

	return(true);

} // onButtonRelease()
Nothing big happens here, but it’s important. We switch off the flag when the user lets go of the button. That’s it, but because of that, next time through onMotionNotify(), our first test:
if((motionEvent.state == ModifierType.BUTTON1_MASK) && _dragOn == true)
Will fail because we’ve turned off the _dragOn flag. And that means, nothing else in that function will be processed and node movement will stop.
Now let’s take a step back and get an overview while we recap…
How the Node’s Position is Determined
In this demo, the node position is set programmatically, so we know where the node is before the first move. From there, each time the user does a click-n-drag, this is what happens:
- in
onButtonPress()we:- figure out which hot spot we’re dealing with,
- turn on the
_dragOnflag, and - record where the mouse pointer is in relation to the upper-left corner of the node,
- in
onMotionNotify()we:- we make sure mouse button #1 is depressed and the node movement flag is on,
- figure out which direction the mouse pointer is moving, and
- pass the new node position to the function that moves the node,
- in
onButtonRelease()we:- we turn off the node movement flag and everything grinds to a halt.
Conclusion
And that’s how to move a node around. Next time we revisit this series, we’ll see about connecting two MoveableNodes with a noodle.
Over the next few posts, we’ll do some special requests from readers and then dig into some hardware stuff (also by special request).
Until then, have a happy and contented coding life.

Comments? Questions? Observations?
Did we miss a tidbit of information that would make this post even more informative? Let's talk about it in the comments.
- come on over to the D Language Forum and look for one of the gtkDcoding announcement posts,
- drop by the GtkD Forum,
- follow the link below to email me, or
- go to the gtkDcoding Facebook page.
You can also subscribe via RSS so you won't miss anything. Thank you very much for dropping by.
© Copyright 2024 Ron Tarrant