0034: Menus IX - AccelGroup as a Singleton
Something about how the AccelGroup was used in gtkDcoding blog post #32 (Adding Accelerator Keys to MenuItems) needs to be addressed. It’s this business of instantiating the AccelGroup at the top level (ie. TestRigWindow) and then passing it down through multiple layers of other UI objects until it gets to where it’s actually needed, in the MenuItem objects.
Not that there’s anything technically wrong with passing the AccelGroup object down like that. It works, so why fix it?
Because if we use a singleton class to hold the AccelGroup, we gain a few things:
- we only need to deal with the
AccelGroupwhere it’s actually needed:- in the top-level window, and
- in the
MenuItemclass definitions that have shortcut keys,
- which means we can dispense with the cumbersome-ness of handing down, and
- we gain elegance.
And for good measure, we’ll cover some Other Useful Stuff TM as we go along.
The Singleton
There’s a lot of discussion about whether or not the singleton should be taken out back and shot. All I will say is that, because it can only be instantiated once, no matter how many times we try, we avoid the ad infinitum passing down and this makes it an elegant solution for the AccelGroup.
Be aware, however, that we don’t instantiate in the normal way. But let’s not get ahead of ourselves. We’ll start with just the naked singleton and go from there.
What we’re starting with to build our S_AccelGroup class can be found in the D Wiki Low-lock Singleton example. And here’s what the basic class looks like:
class MySingleton
{
    private this() {}

    // Cache instantiation flag in thread-local bool
    private static bool instantiated_;

    // Thread global
    private __gshared MySingleton instance_;

    static MySingleton get()
    {
        if(!instantiated_)
        {
            synchronized(MySingleton.classinfo)
            {
                if(!instance_)
                {
                    instance_ = new MySingleton();
                }

                instantiated_ = true;
            }
        }

        return(instance_);
    }
}
Seems complicated, right? Well, the only things we really need to know are:
- we instantiate or get a reference with a call to
get()wherever we need to deal with this object, - never ever call the constructor (if we do this up right, we can’t call it directly, anyway),
- the
privatekeyword will only do its job if this class is in amoduleof its own, and - anything we add to this to make it useful goes into the constructor.
So, after a few naming convention changes, our S_AccelGroup class (which you can find in this example file right here) looks like this:
module singleton.S_AccelGroup;

import std.stdio;

import gtk.AccelGroup;

class S_AccelGroup : AccelGroup
{
	private:
	// Cache instantiation flag in thread-local bool
	static bool instantiated_;

	// Thread global
	__gshared S_AccelGroup instance_;

	this()
	{
		super();

	} // this()

	public:

	static S_AccelGroup get()
	{
		write("getting...");

		if(!instantiated_)
		{
			synchronized(S_AccelGroup.classinfo)
			{
				if(!instance_)
				{
					instance_ = new S_AccelGroup();
					writeln("creating");
				}

				instantiated_ = true;
			}
		}
		else
		{
			writeln("not created");
		}

		return(instance_);

	} // get()

} // class S_AccelGroup
Note: If you use this locally, don’t forget to put this in its own sub-directory.
Right at the top, we have:
module S_AccelGroup;
Technically, you could put a similar statement at the top of every one of your .d files, turning them all into modules and it wouldn’t really change anything for that code file, per se. What it does is give us a way to import it for those times when we want the code from one file available to another.
Note that the module statement has to be the first statement in the file. You can have a comment above it, but nothing else.
The file needs to be saved as S_AccelGroup.d (the module name plus a .d extension) and just for kicks, I put it in its own sub-directory which means the path and filename in relation to our dev directory is:
./singleton/S_AccelGroup.d
Hold that thought as we go into the next section…
Other Useful Stuff #1: Using an External Class
To bring the external file into the mix for compiling/linking, we need an import statement which you’ll find near the top of today’s primary code file. Any time the file you want to import is in a sub-directory, replace the slash (/) with a dot (.) in your import statement… like this:
import singleton.S_AccelGroup;
If I’d put this file in the same directory as our primary .d file, the import statement would look like this instead:
import S_AccelGroup;
Okay, now you can let go of that thought from the previous section.
Attaching the S_AccelGroup to the MainWindow
Just like with the stock AccelGroup, we need to attach it to the MainWindow which means our TestRigWindow class now looks like this:
class TestRigWindow : MainWindow
{
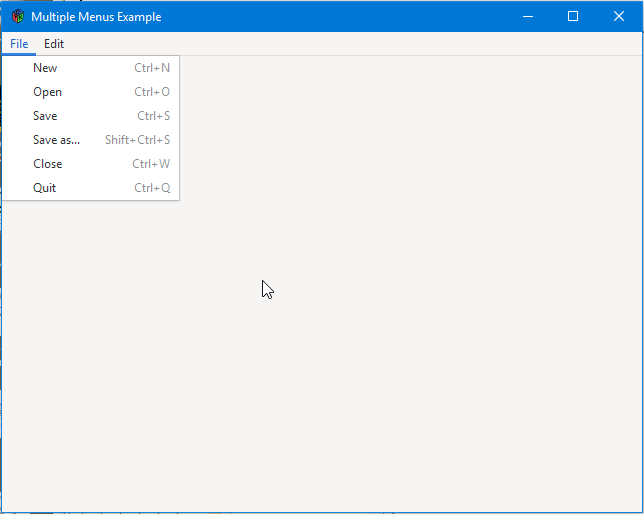
string title = "Multiple Menus Example";
S_AccelGroup s_AccelGroup;
this()
{
super(title);
setDefaultSize(640, 480);
addOnDestroy(&quitApp);
s_AccelGroup = s_AccelGroup.get();
addAccelGroup(s_AccelGroup);
AppBox appBox = new AppBox();
add(appBox);
showAll();
} // this()
void quitApp(Widget w)
{
// do other quit stuff here if necessary
Main.quit();
} // quitApp()
} // class TestRigWindow
I’ll draw your attention to three things here:
- the definition of
s_AccelGroupnear the top, - the constructor where we call
s_AccelGroup.get()to instantiate, and - also in the constructor, where we
addAccelGroup()to attach it to the window.
The Other End of Things: Inside the MenuItem Class
For each MenuItem that has a hotkey, we rewrite its definition to look similar to this:
class NewFileItem : MenuItem
{
	string itemLabel = "New";
	char accelKey = 'n';
	S_AccelGroup s_AccelGroup;

	this()
	{
		s_AccelGroup = s_AccelGroup.get();
		super(&doSomething, itemLabel, "activate", false, s_AccelGroup, accelKey, ModifierType.CONTROL_MASK, AccelFlags.VISIBLE);

	} // this()


	void doSomething(MenuItem mi)
	{
		writeln("New file created.");

	} // doSomething()

} // class NewFileItem
Again, we need three statements to set up and use the S_AccelGroup:
- the declaration near the top,
- the call to
s_AccelGroup.get()in the constructor, and - the fifth argument that’s passed to
super().
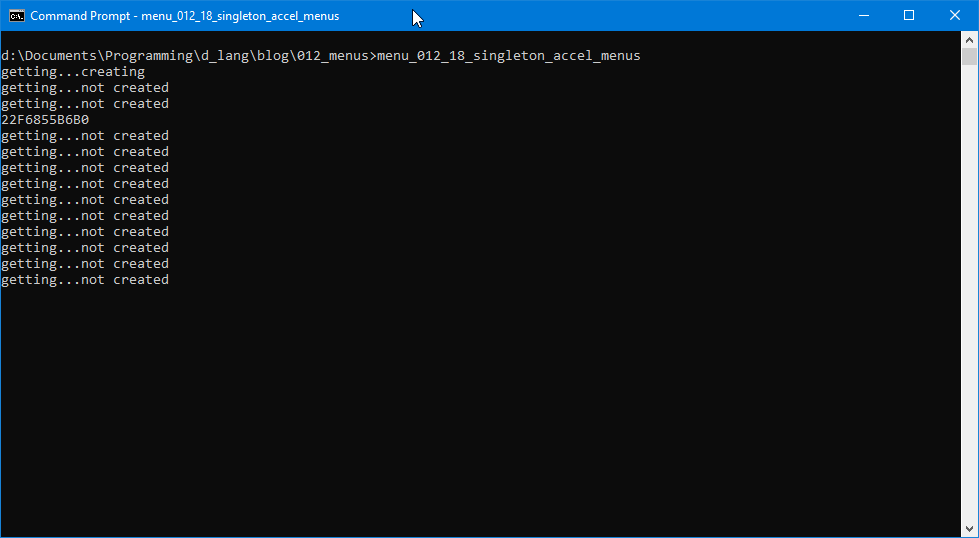
And if you want to prove to yourself that all these MenuItems really do use the same S_AccelGroup, add this line as the last statement in the constructors of a few of the MenuItems:
writeln(&s_AccelGroup);
The address echoed to the terminal will be the same for each.
Other Useful Stuff #2: Important Compiling Note
When you go to compile this, because our code is now in two separate files, you’ll need to add the –i switch on the command line. Here’s the Windows version:
dmd –de –w –m64 –Lgtkd.lib –i <filename>.d
It’s the same in Linux, just add –i to whatever compile command you usually use:
dmd -de -w -m64 -i -I/usr/include/dmd/gtkd3 -L-L/usr/lib/x86_64-linux-gnu -L-L/usr/lib/i386-linux-gnu -L-l:libgtkd-3.so -L-l:libdl.so.2 -L--no-warn-search-mismatch -defaultlib=libphobos2.so <code-filename>.d -of<executable-filename>
or the short form:
dmd -de -w -m64 -i `pkg-config --cflags --libs gtkd-3` <code-filename>.d -of<executable-filename>
or the alias:
dbuild -i <code_filename>.d
Conclusion
Even though doing the AccelGroup up as a singleton isn’t necessary, it’s more elegant and more readily reusable. We just need to remember that wherever we refer to the singleton, no matter what it’s used for, we:
- define it,
- call
<singleton_name>.get()to instantiate or get a reference, and - then use whatever we’ve added to the singleton’s constructor for whatever nefarious purpose we have.
As an extra bonus today, we also went over how to split our code over more than one file. In a nutshell:
- move the code for a class into its own file,
- name it using CamelCase, and
- give it a
.dextension,
- to the very top of the file, add the line:
module <FileNameWithoutExtension>;
importit into your primary code file just as you would any other library or wrapper, and- use the
–iflag when compiling.
And that’s it for another gtkDcoding blog post. Until next time…

Comments? Questions? Observations?
Did we miss a tidbit of information that would make this post even more informative? Let's talk about it in the comments.
- come on over to the D Language Forum and look for one of the gtkDcoding announcement posts,
- drop by the GtkD Forum,
- follow the link below to email me, or
- go to the gtkDcoding Facebook page.
You can also subscribe via RSS so you won't miss anything. Thank you very much for dropping by.
© Copyright 2024 Ron Tarrant